Hi all,
In Previous post we had seen how to download the Rollup of NAV 2013 and Later.
Let's see how to apply Rollup of Microsoft Dynamics Rollup for NAV 2013 & NAV 2013 R2.
Remember - Before applying the rollup there should be no user accessing client. All NAV Services, NAV Clients (windows & developer Environment) should be stopped & closed.
Thank you +nishant srivastava for suggesting correction in the article.
File Already Downloaded in previous post, Extract the file in a folder and open the extracted Folder.

Let's Start.
1. Folder ADCS (Microsoft Dynamics NAV Automated Data Capture System) -

Copy all the files in the ADCS Folder and Paste them at - C:\Program Files (x64)\Microsoft Dynamics NAV\71\Automated Data Capture System.
*Default Installation.
If asked for confirmation or Replace select Replace All.
2. Folder APPLICATION (Code Changes) -
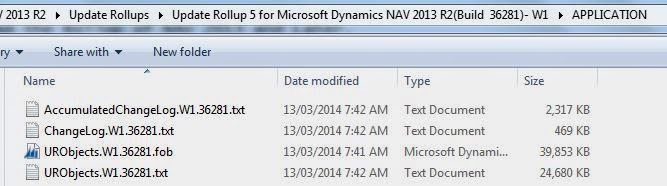
The Files inside the folder contain the changes done in Navision Objects.
Change Log (If you want to Merge the New Changes).
Objects in FOB and Text Format.
For Installation / Applying this -
Case 1. Local Rollup - Available.
Required on - Standard Cronus Database.
Action - Import them directly.
Case 2. Local Rollup - Available.
Required on - Customized Database.
Action - Merge the Changes.
Case 3. Local Rollup - Not Available.
Required on - Standard / Customized Database.
Action - Merge the Changes.
3. Folder NST (Navision Service Tier) -
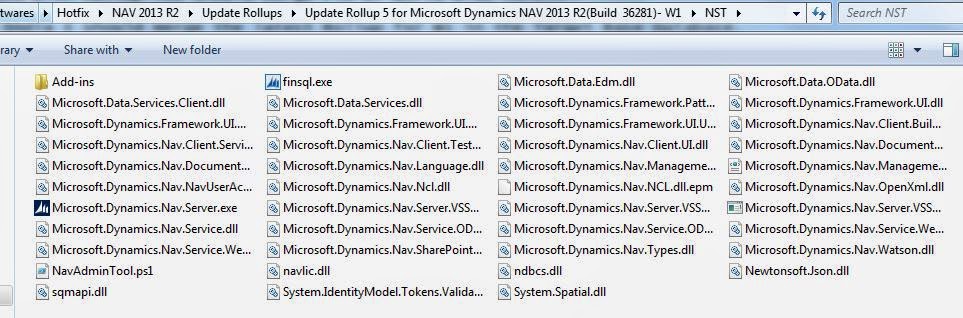
Copy all the files in the NST Folder and Paste them at - C:\Program Files\Microsoft Dynamics NAV\71\Service.
*Default Installation.
If asked for confirmation or Replace select Replace All.
4. Folder OUTLOOK (Microsoft Office Outlook Integration) -

Copy all the files in theNST Outlook Folder and Paste them at - C:\Program Files(x64)\Microsoft Office\Office xx.
*Default Installation.
If asked for confirmation or Replace select Replace All.
5. Folder RTC (Role Tailored Client) -

Copy all the files in the NST RTC Folder and Paste them at - C:\Program Files (x86)\Microsoft Dynamics NAV\71\RoleTailored Client.
*Default Installation.
If asked for confirmation or Replace select Replace All.
6. Folder WEB CLIENT -

Copy all the files in theNST Web Client Folder and Paste them at - C:\Program Files\Microsoft Dynamics NAV\70\Web Client.
*Default Installation.
If asked for confirmation or Replace select Replace All.
Hope this clear all the doubts that we have while trying to apply the Rollup.
Regards,
Saurav Dhyani
In Previous post we had seen how to download the Rollup of NAV 2013 and Later.
Let's see how to apply Rollup of Microsoft Dynamics Rollup for NAV 2013 & NAV 2013 R2.
Remember - Before applying the rollup there should be no user accessing client. All NAV Services, NAV Clients (windows & developer Environment) should be stopped & closed.
Thank you +nishant srivastava for suggesting correction in the article.
File Already Downloaded in previous post, Extract the file in a folder and open the extracted Folder.

Let's Start.
1. Folder ADCS (Microsoft Dynamics NAV Automated Data Capture System) -

Copy all the files in the ADCS Folder and Paste them at - C:\Program Files (x64)\Microsoft Dynamics NAV\71\Automated Data Capture System.
*Default Installation.
If asked for confirmation or Replace select Replace All.
2. Folder APPLICATION (Code Changes) -

The Files inside the folder contain the changes done in Navision Objects.
Change Log (If you want to Merge the New Changes).
Objects in FOB and Text Format.
For Installation / Applying this -
Case 1. Local Rollup - Available.
Required on - Standard Cronus Database.
Action - Import them directly.
Case 2. Local Rollup - Available.
Required on - Customized Database.
Action - Merge the Changes.
Case 3. Local Rollup - Not Available.
Required on - Standard / Customized Database.
Action - Merge the Changes.
3. Folder NST (Navision Service Tier) -

Copy all the files in the NST Folder and Paste them at - C:\Program Files\Microsoft Dynamics NAV\71\Service.
*Default Installation.
If asked for confirmation or Replace select Replace All.
4. Folder OUTLOOK (Microsoft Office Outlook Integration) -

Copy all the files in the
*Default Installation.
If asked for confirmation or Replace select Replace All.
5. Folder RTC (Role Tailored Client) -

Copy all the files in the NST RTC Folder and Paste them at - C:\Program Files (x86)\Microsoft Dynamics NAV\71\RoleTailored Client.
*Default Installation.
If asked for confirmation or Replace select Replace All.
6. Folder WEB CLIENT -

Copy all the files in the
*Default Installation.
If asked for confirmation or Replace select Replace All.
Hope this clear all the doubts that we have while trying to apply the Rollup.
Regards,
Saurav Dhyani
Comments
Post a Comment